My favorite part of decorating for a party is putt My favorite part of decorating for a party is putting together the table setting! This one turned out so elegant and timeless 🤩🤍 I’ll share what I used for the draped, pleated look in another video. Comment SHOP for all the links to my parents’ wedding anniversary party decor! #tablesetup #anniversaryparty #tablesettingideas
Party prep for my parents’ 50th wedding annivers Party prep for my parents’ 50th wedding anniversary! 👰🏻‍♀️🤵🏻‍♂️💍 This was such a big milestone that I wanted to go all out for the party decor 🤍 My parents met shortly after coming to America when the Vietnam War ended and got married within 6 months. 50 years later and here we are 🥹 If you want any decor links, just comment SHOP!  #weddinganniversary
Can’t believe we installed this pergola ourselve Can’t believe we installed this pergola ourselves! We have a friend that paid $1500 to get it installed so we were afraid it was going to be a lot of work. But it was pretty straightforward and everything came packaged nicely and organized. We finished the pergola itself in 4 hours!

Once we had it bolted down by our concrete guy, we added the accessories. Should I fully enclose this @miradoroutdoor pergola with two more pull down screens on the sides?! Comment SHOP for the pergola link and use code TINA05 for an extra 5% off! #pergola #miradorpergola #moretoenjoy
BACKYARD MAKEOVER PART 3! We made it to the final BACKYARD MAKEOVER PART 3! We made it to the final reveal! We ripped up some muddy grass, poured concrete, dug up and moved our irrigation system, planted a ton of trees and hydrangeas, and put up a new pergola. This project was 1.5 months in the making and it feels amazing to be finished. We are already hanging out here so much more and the concrete really makes the space more usable.

If you’re looking for my @miradoroutdoor pergola, it’s is currently 30% off for early Labor Day weekend sale and you can use my code TINA05 for an extra 5% off 🤍 Comment SHOP for all the links and I hope you enjoyed this backyard makeover series! #backyardproject #miradorpergola #moretoenjoy #outdoorpatio
BACKYARD MAKEOVER PART 2! After pouring concrete, BACKYARD MAKEOVER PART 2! After pouring concrete, I wanted to soften it up with lots of new plants. But before we could do that, our entire sprinkler system had to be dug up and rerouted! The backyard was crazy messy for weeks.

Once we were able to plant, we went from 0 plants to 18 emerald green trees and 32 hydrangeas and they made the biggest difference! I knew nothing about plants before and now I learned so much about hydrangeas. Come back for Part 3, the final reveal! #backyardmakeover #backyarddesign
BACKYARD MAKEOVER PART 1! We’ve been wanting to BACKYARD MAKEOVER PART 1! We’ve been wanting to redo our backyard for years. One designer suggested pea gravel while another suggested pavers and turf. And while I liked both designs, why didn’t anyone mention pouring concrete?! It’s so much more affordable and cut the cost by half! Come back for part ✌🏻 #concretepour #concretepatio #backyardmakeover
MARGARITA BAR CART! 🌸🍹🍓🍋✨ I love set MARGARITA BAR CART! 🌸🍹🍓🍋✨ I love setting up  a self-serve drink bar so guests can make their drink however they’d like. This one was a hit! Comment SHOP and I’ll send you links to everything. Bottoms up! #magaritas #drinkstation #barcart
#ad Easy, cold lunch ideas! 🥪✨ My formula is #ad Easy, cold lunch ideas! 🥪✨ My formula is to do a main, fresh fruit, veggie, savory snack and a little treat. I got all of the groceries, lunchbox supplies and back-to-school stuff from @fredmeyerstores!! #FredMeyer #FredMeyerPartner #backtoschool #lunchboxideas
PANTRY ORGANIZATION! Comment SHOP for all the cont PANTRY ORGANIZATION! Comment SHOP for all the containers and organizing links! 🛒✨

This pantry was STRESSING me out! I finally took everything out, tossed so many expired items, and grouped everything by category. The best part is that I barely bought any new containers!

Here’s what I did differently:
• Low-profile baskets for small snacks: I can actually see everything now instead of digging through big baskets of random snacks.
• Less decanting: I had way too many jars, and transferring everything was extra work for items we barely used.
• Labeled everything: I never really labeled before, which made it way too easy to forget what we had.
• Ditched the rolling can rack: Cans in the back were always getting forgotten so now I use a behind-the-door organizer where I can see everything at once.

I LOVE how this pantry organization turned out, and I’m actually confident we can keep it this way! 🙌🏼 #pantryorganization #kitchenorganizationideas
  • About
  • TikTok
  • My Amazon Page
  • My LTK
  • Lifestyle
    • Beauty + Hair
    • Career + Finance
    • Culture
    • Food + Recipes
    • Travel
    • Wedding
    • All
  • Home
    • DIY
    • Entertain / Parties
    • Home Decor
    • Organization + Cleaning
    • All
  • Motherhood
    • Maternity Outfits
    • Pregnancy + Postpartum
    • Baby 0-12 months
    • Toddler
    • All
  • Fashion
    • Fall / Winter Oufits
    • Spring / Summer Outfits
    • Maternity Outfits
    • All
  • Shop + Links
    • My Instagram / TikTok
    • My Amazon Page
    • My Home
    • My Favorite Retailers
  • Contact
    • About
    • Contact Me
    • FAQ

Just A Tina Bit

A Seattle Lifestyle Blog

  • Lifestyle
    • Beauty + Hair
    • Career + Finance
    • Culture
    • Food + Recipes
    • Travel
    • Wedding
    • All
  • Home
    • DIY
    • Entertain / Parties
    • Home Decor
    • Organization + Cleaning
    • All
  • Motherhood
    • Maternity Outfits
    • Pregnancy + Postpartum
    • Baby 0-12 months
    • Toddler
    • All
  • Fashion
    • Fall / Winter Oufits
    • Spring / Summer Outfits
    • Maternity Outfits
    • All
  • Shop + Links
    • My Instagram / TikTok
    • My Amazon Page
    • My Home
    • My Favorite Retailers
  • Contact
    • About
    • Contact Me
    • FAQ

DIY, Home, Motherhood, Toddler · October 31, 2022

DIY Toy Story Family Costumes

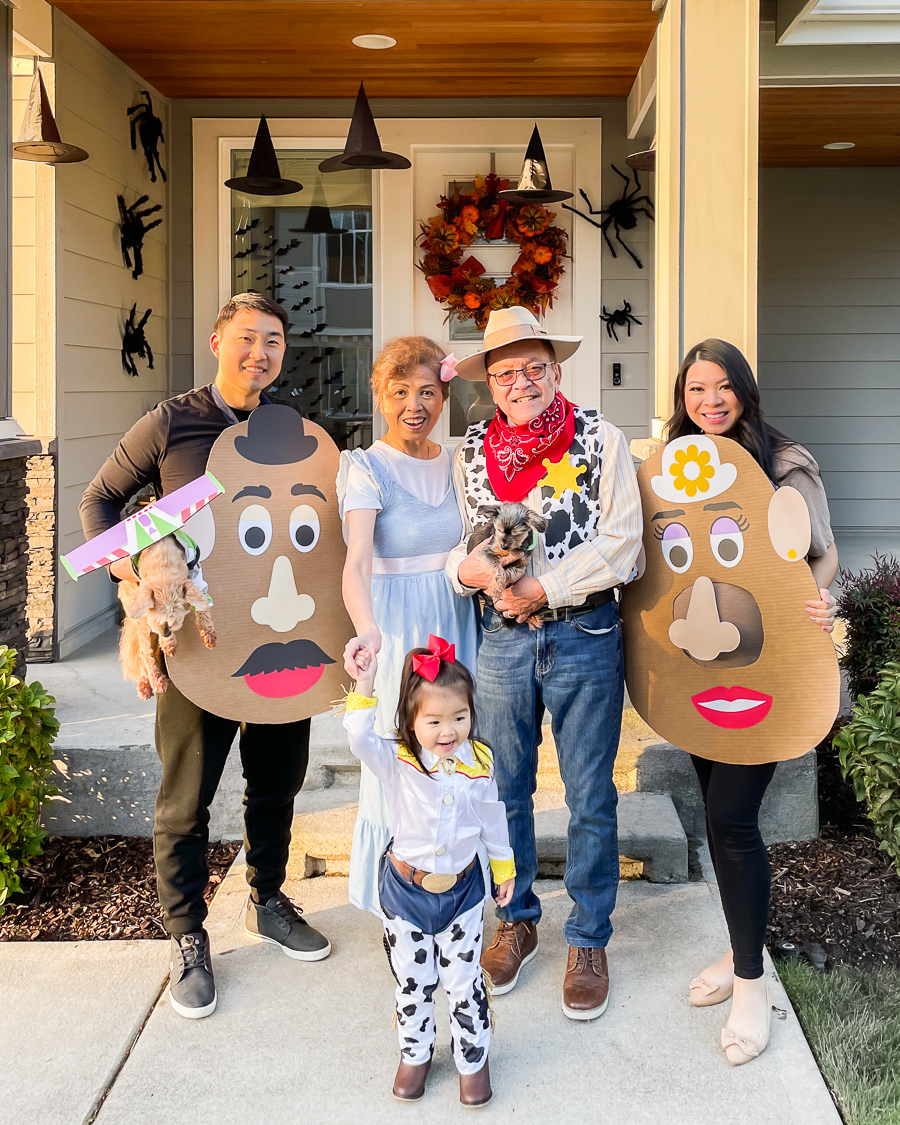
Happy Halloween!!! How is it already October 31?! For our Halloween costumes this year, I asked Olivia what she wanted to be and she said Jessie from Toy Story. She’s been obsessed with Toy Story 4 and reads the books every night. It only made sense that we would do Toy Story family costumes!

For our Toy Story family costumes, I got the whole fam involved – grandparents too! It was so cute seeing my parents dressed up. I improvised and made our costumes the week leading up to Halloween. Every year, I always try to DIY our costumes by using what I already have and only buying a few things to make the costumes. I was really proud of myself for DIYing our Toy Story family costumes for under $50 total!

Our DIY Toy Story Family Costumes
toy story family costumes, family matching costumes, family halloween costumes, diy toy story family costumes

Jessie Toddler Costume

Olivia’s Jessie toddler costume was the only one I fully bought. Our neighbor gets a Disney discount and hooked us up so we said why not! Plus, it was nice to buy one costume and not have to think about it. We even got her the matching Jessie hat but she refused to wear it. Oh well, a red bow will do! Although the costume was a great deal with the discount, I thought the fit was baggy and not flattering. I like this version more. We also had these cowboy boots already from her birthday party.

Total spent: $25

toy story family costumes, family matching costumes, family halloween costumes, diy toy story family costumes, toy story 4 costumes, DIY Bo Peep, Woody, Jessie Halloween costumes

Woody Costume

Olivia’s grandpa (my dad) was Woody and he totally stole the show! For his costume, I made the iconic Woody vest using cow print fabric. I bought one yard of fabric for less than $5 since Joann’s always offers discount codes if you have their app. I cut the fabric into three pieces – one back and two front pieces (right and left). I don’t know how to sew so I used heat and bond tape to adhere the pieces together. All you need is an iron to activate the glue. I had my dad try it on multiple times so I could measure and cut down the vest to fit him. It’s better to start off big than make it too small.

I also bought my dad a $2 red bandana (again, check Joann’s for those discount codes!). For the rest of his Woody costume, we had everything on hand. A yellow shirt, jeans, and a belt. My dad wore one of Jeff’s shoes and he borrowed my felt hat lol. I also cut out a cardstock yellow badge with my Cricut.

Total spent: $7
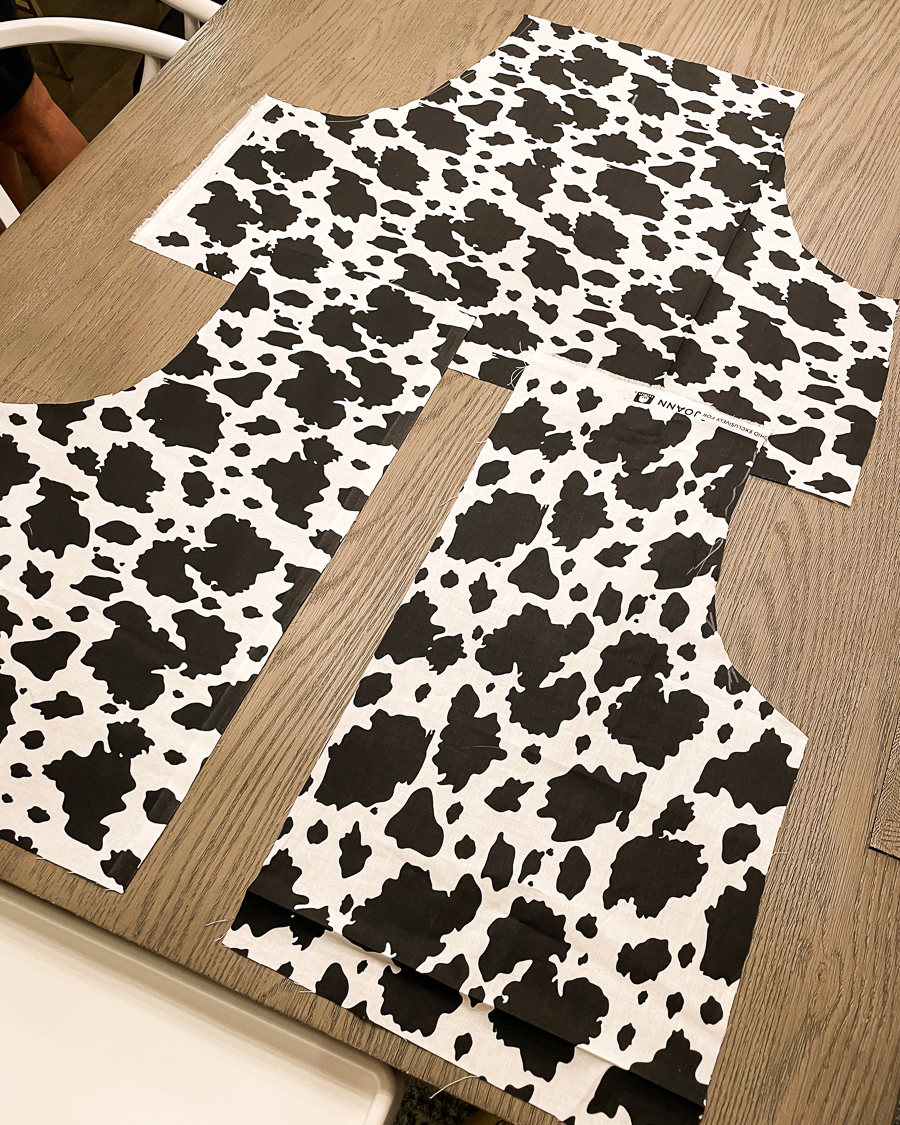
DIY Woody costume, DIY toy story costume, DIY Woody vest no sew

Bo Peep Costume

My mom was Bo Peep and she was so adorable! Her costume was actually the easiest to make. I already had this chambray dress and it reminded me of Bo Peep’s Toy Story 4 outfit. I wasn’t sure how her costume would turn out to be honest. But once my mom wore a white t-shirt underneath the dress and I tied a pink ribbon around her waist, I knew it would come together! For the finishing touches, I put one of Olivia’s big pink bows in her hair and she wore my black bow flats. That was it! Grandma rocked it!

Total spent: $0

bo peep costume, DIY adult toy story costume, woody costume, grandparents costume

Mr. and Mrs. Potato Head Costumes

Jeff and I were Mr. and Mrs. Potato Heads. I wanted to be Mrs. Potato Head because I thought it would be funny with my pregnant belly. I got two trifold presentation boards from Joann’s, which we cut into potato shapes with an Exacto knife. Jeff also cut out a hole for my belly. I used my Cricut to cut a bunch of basic shapes like ovals and circles to make the eyes and ears. Then I found images in Cricut Design Space for the mouthes, hats, and eyebrows. I had most of the cardstock colors on hand already and only bought red paper for the mouths. Once I cut out all of the pieces with my Cricut, I glued everything onto the cardboard. We attached ribbons to the costumes and tied them around our necks. Such a fun costume and would be a cute couple costume idea too!

Total spent: $10
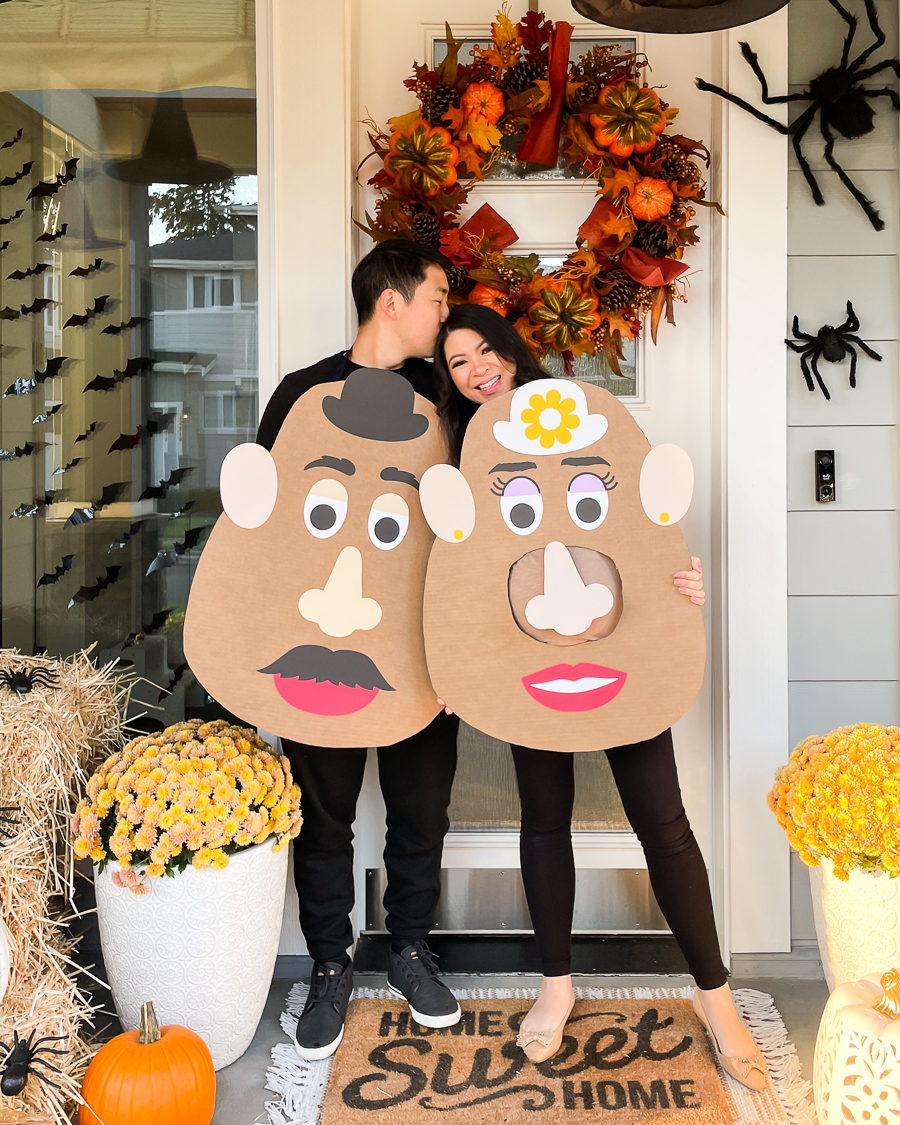
mr and mrs potato head costumes, matching couple costume, DIY toy story costume, cardboard mr and mrs potato head, pregnant costume idea, costume with hole for pregnant belly idea

Buzz Lightyear Dog Costume

After being on a roll with the Mr. and Mrs. Potato Head, I was like hey I could probably also mock up Buzz Lightyear’s wings with my Cricut. I used neon green, purple, white, and red cardstock paper and glued the cut pieces onto a small cardboard piece (part of an Amazon box). Then Jeff used an Exacto knife to cut out the shape. We taped pipe cleaners to the wings and secured them around Tails’ arms. He also wore a Buzz Lightyear toddler pajama shirt which was a hand-me-down from my cousin. It fit him perfectly!

Total spent: $0
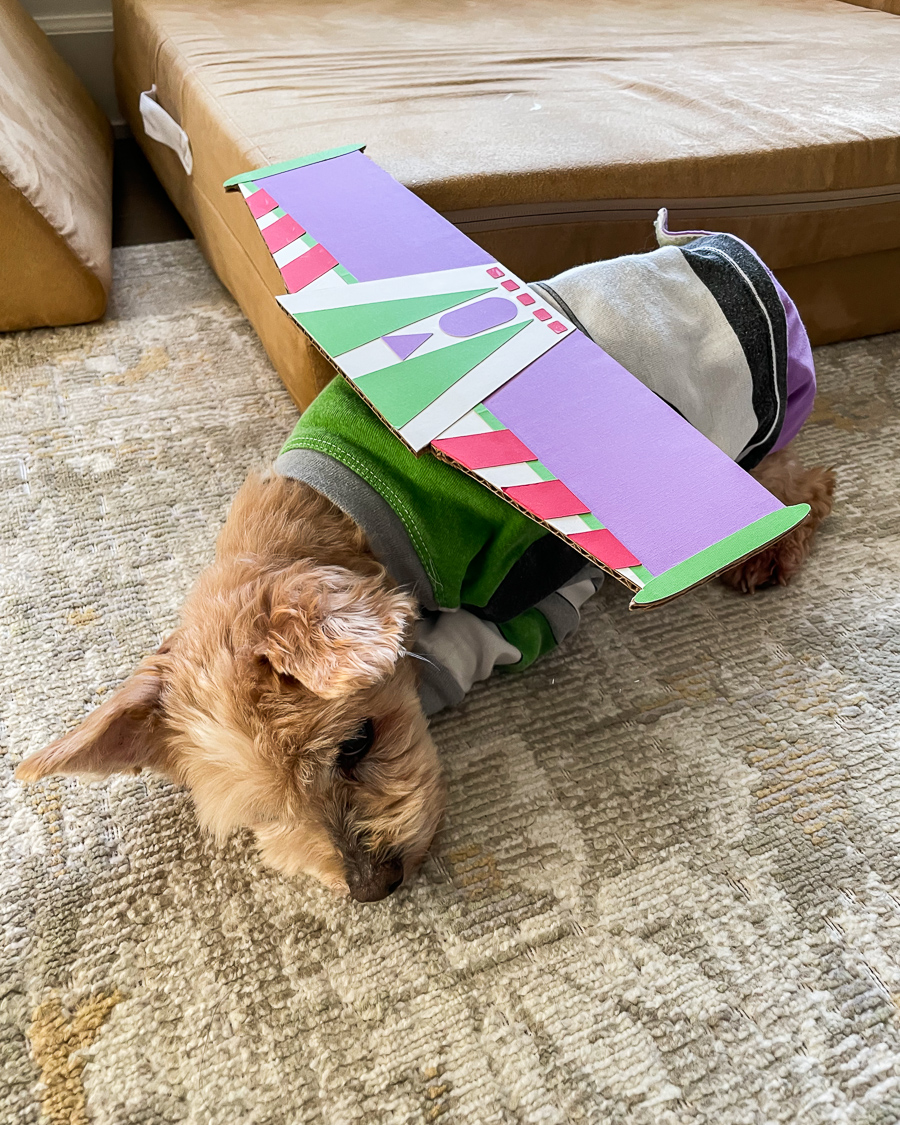
dog buzz lightyear costume, dog costume, family toy story costumes, DIY cardboard buzz lightyear wings

Slinky Dog Costume

I have to admit, this was the worst costume I made lol. For Slinky, I purchased silver pipe cleaners for $2 and wrapped them around Boba’s body and cut out a green collar. That was literally it. It was a little janky, but hey, Boba is half Yorkie half dachshund, and has a really long body so I think she passes!

Total spent: $2

kids jessie costume, matching family costumes, DIY jessie costume, dog Buzz Lightyear costume, Slinky dog costume

The Complete Toy Story Family Costumes

Total spent on these DIY Toy Story family costumes? $44!! My family and I had so much fun dressing up together and I’ll cherish these pictures forever! Happy Halloween from my family to yours! Hope your day is filled with lots of treats and no tricks 🙂
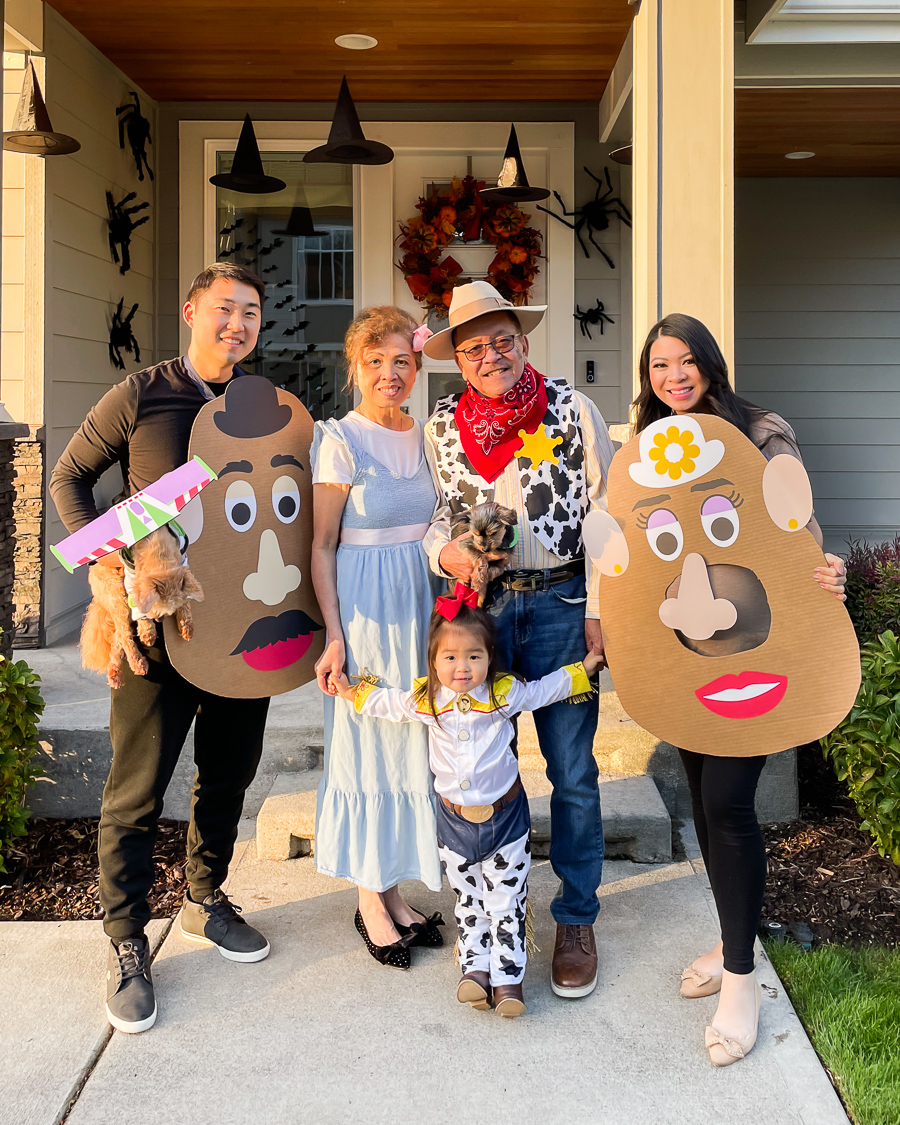
toy story family costumes, family matching costumes, family halloween costumes, diy toy story family costumes

Shop the Toy Story Family Costumes

SHOP THE POST

Jessie Costume | Toddler Jessie Hat | Amazon Jessie Costume (I liked this version more!) | Toddler Girl Boots | Cow Print Fabric | Red Bandana | Felt Hat | Heat and Bond Tape | Smocked Dress | Pink Ribbon | Pink or Red Bow | Black Bow Flats | Trifold Presentation Board | Cricut Maker 3 | Exacto Knife | Red Cardstock | Silver Pipe Cleaners

Share this:

  • Click to share on Twitter (Opens in new window)
  • Click to share on Facebook (Opens in new window)

In: DIY, Home, Motherhood, Toddler · Tagged: Halloween

don’t miss a post

You’ll Also Love

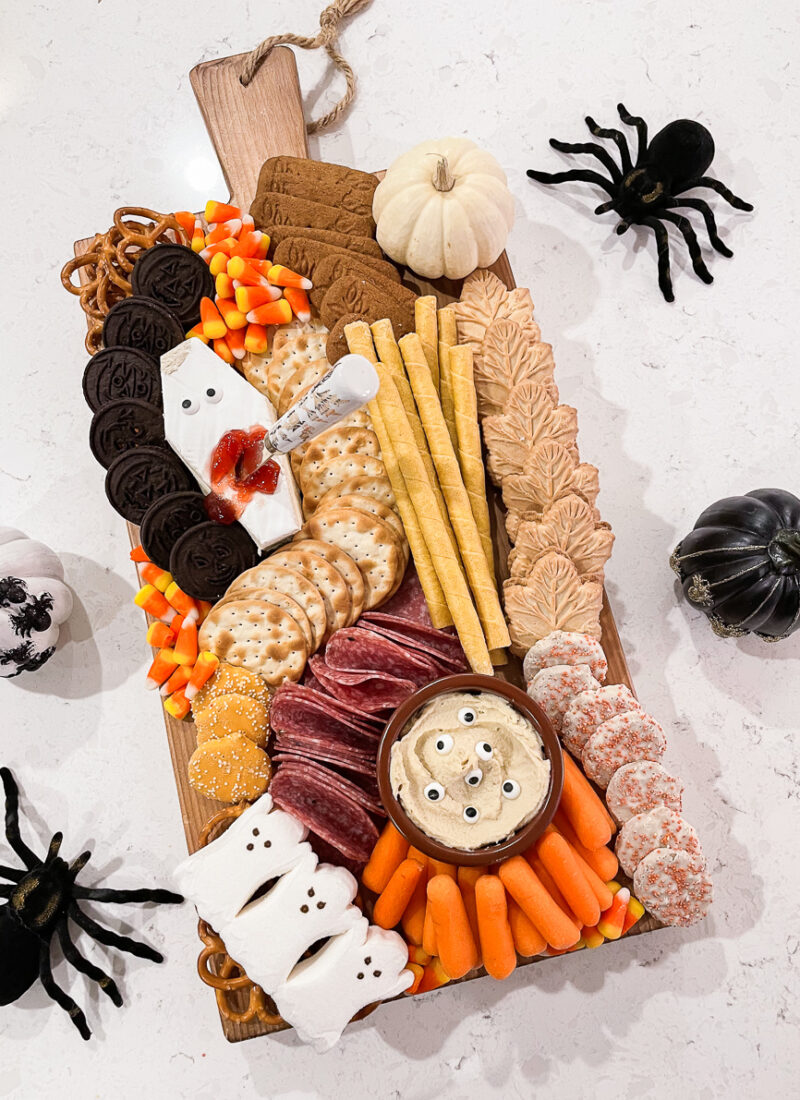
Trader Joe’s Halloween Charcuterie Board + Pumpkin Carving Party
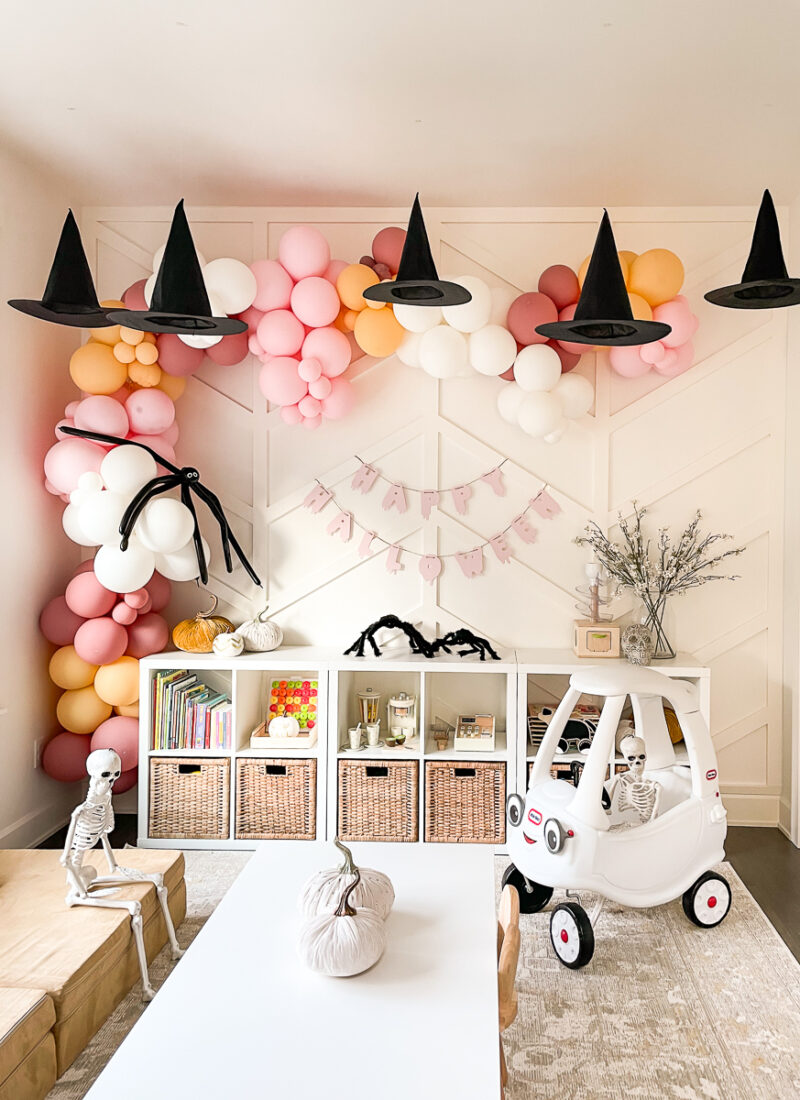
Halloween Playroom Reveal
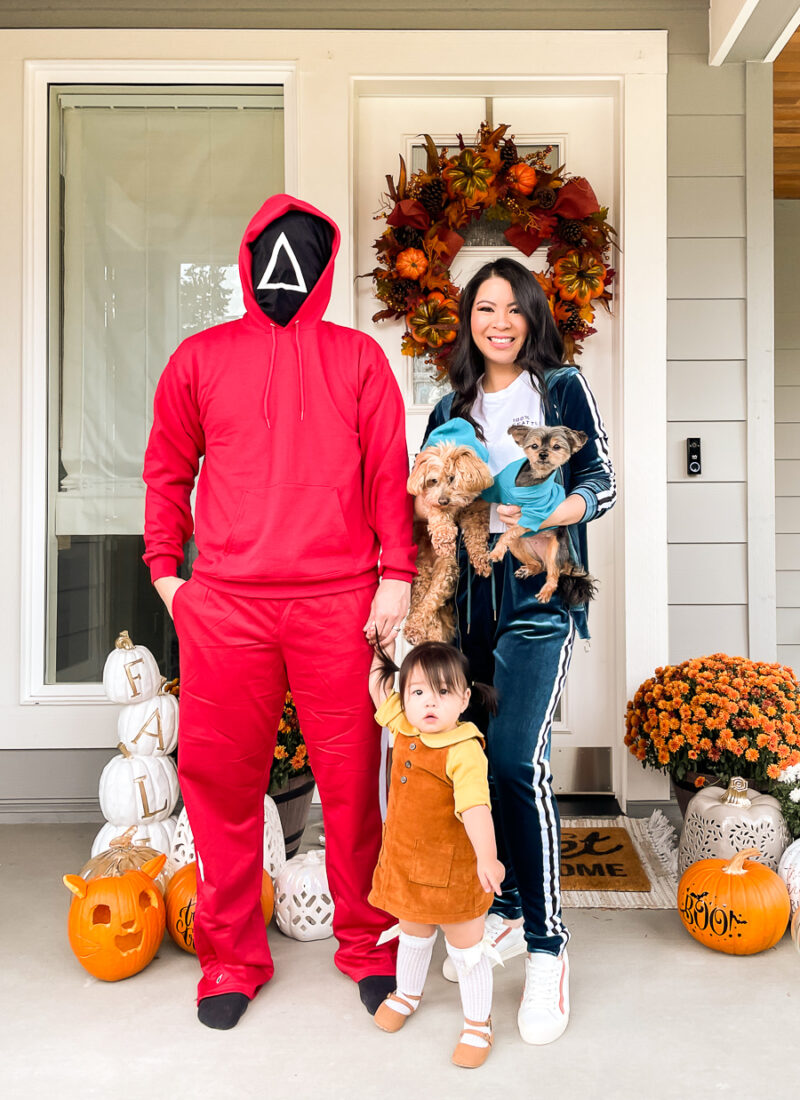
DIY Halloween Costume, Easy Costume Ideas, Original Costume, Family Halloween Costume, Pet Halloween Costume, Cat, Ghost, Unicorn, Wednesday Adams, Squid Games, Targaryen, Dragons, Halloween5 DIY Halloween Costume Ideas

Comments

  1. JESSICA says

    October 21, 2024 at 9:02 pm

    Hi,
    This is awesome.
    I am wondering how did you do to do the Buzz Lightyear costume on the cricut. Did you create each part on the app?
    Thank you in advance

    Reply
  2. Mona says

    April 19, 2025 at 1:44 pm

    So cute! Yay for family-costuming, too – I absolutely love that you involved the grandparents.

    Reply

Leave a Reply Cancel reply

Your email address will not be published. Required fields are marked *

I accept the Privacy Policy

This site uses Akismet to reduce spam. Learn how your comment data is processed.

Next Post >

Trader Joe’s Halloween Charcuterie Board + Pumpkin Carving Party

Welcome to Just A Tina Bit, a Seattle-based lifestyle blog specifically tailored to millennial working moms. Whether it's being a first time mom, juggling a career in tech, styling and organizing your home, or having fun with DIY projects, I'm here to share all my experiences and hacks so that you can make life just a little bit easier!

Shop My Instagram

Where I Shop for Fashion

Amazon
Asos
Banana Republic
J.Crew
LOFT
Madewell
Nordstrom
Nordstrom Rack
Old Navy
Revolve
Shopbop
Target

Where I Shop for Home Decor

Amazon
Anthropologie
CB2
Crate & Barrel
Etsy
HomeGoods
Marshalls
Minted
Pottery Barn
Pottery Barn Kids
Serena & Lily
Target
Wayfair
West Elm
World Market

Search by Keyword

instagram

Follow @justatinabit

My favorite part of decorating for a party is putt My favorite part of decorating for a party is putting together the table setting! This one turned out so elegant and timeless 🤩🤍 I’ll share what I used for the draped, pleated look in another video. Comment SHOP for all the links to my parents’ wedding anniversary party decor! #tablesetup #anniversaryparty #tablesettingideas
Party prep for my parents’ 50th wedding annivers Party prep for my parents’ 50th wedding anniversary! 👰🏻‍♀️🤵🏻‍♂️💍 This was such a big milestone that I wanted to go all out for the party decor 🤍 My parents met shortly after coming to America when the Vietnam War ended and got married within 6 months. 50 years later and here we are 🥹 If you want any decor links, just comment SHOP!  #weddinganniversary
Can’t believe we installed this pergola ourselve Can’t believe we installed this pergola ourselves! We have a friend that paid $1500 to get it installed so we were afraid it was going to be a lot of work. But it was pretty straightforward and everything came packaged nicely and organized. We finished the pergola itself in 4 hours!

Once we had it bolted down by our concrete guy, we added the accessories. Should I fully enclose this @miradoroutdoor pergola with two more pull down screens on the sides?! Comment SHOP for the pergola link and use code TINA05 for an extra 5% off! #pergola #miradorpergola #moretoenjoy
BACKYARD MAKEOVER PART 3! We made it to the final BACKYARD MAKEOVER PART 3! We made it to the final reveal! We ripped up some muddy grass, poured concrete, dug up and moved our irrigation system, planted a ton of trees and hydrangeas, and put up a new pergola. This project was 1.5 months in the making and it feels amazing to be finished. We are already hanging out here so much more and the concrete really makes the space more usable.

If you’re looking for my @miradoroutdoor pergola, it’s is currently 30% off for early Labor Day weekend sale and you can use my code TINA05 for an extra 5% off 🤍 Comment SHOP for all the links and I hope you enjoyed this backyard makeover series! #backyardproject #miradorpergola #moretoenjoy #outdoorpatio
BACKYARD MAKEOVER PART 2! After pouring concrete, BACKYARD MAKEOVER PART 2! After pouring concrete, I wanted to soften it up with lots of new plants. But before we could do that, our entire sprinkler system had to be dug up and rerouted! The backyard was crazy messy for weeks.

Once we were able to plant, we went from 0 plants to 18 emerald green trees and 32 hydrangeas and they made the biggest difference! I knew nothing about plants before and now I learned so much about hydrangeas. Come back for Part 3, the final reveal! #backyardmakeover #backyarddesign
BACKYARD MAKEOVER PART 1! We’ve been wanting to BACKYARD MAKEOVER PART 1! We’ve been wanting to redo our backyard for years. One designer suggested pea gravel while another suggested pavers and turf. And while I liked both designs, why didn’t anyone mention pouring concrete?! It’s so much more affordable and cut the cost by half! Come back for part ✌🏻 #concretepour #concretepatio #backyardmakeover
MARGARITA BAR CART! 🌸🍹🍓🍋✨ I love set MARGARITA BAR CART! 🌸🍹🍓🍋✨ I love setting up  a self-serve drink bar so guests can make their drink however they’d like. This one was a hit! Comment SHOP and I’ll send you links to everything. Bottoms up! #magaritas #drinkstation #barcart
#ad Easy, cold lunch ideas! 🥪✨ My formula is #ad Easy, cold lunch ideas! 🥪✨ My formula is to do a main, fresh fruit, veggie, savory snack and a little treat. I got all of the groceries, lunchbox supplies and back-to-school stuff from @fredmeyerstores!! #FredMeyer #FredMeyerPartner #backtoschool #lunchboxideas
PANTRY ORGANIZATION! Comment SHOP for all the cont PANTRY ORGANIZATION! Comment SHOP for all the containers and organizing links! 🛒✨

This pantry was STRESSING me out! I finally took everything out, tossed so many expired items, and grouped everything by category. The best part is that I barely bought any new containers!

Here’s what I did differently:
• Low-profile baskets for small snacks: I can actually see everything now instead of digging through big baskets of random snacks.
• Less decanting: I had way too many jars, and transferring everything was extra work for items we barely used.
• Labeled everything: I never really labeled before, which made it way too easy to forget what we had.
• Ditched the rolling can rack: Cans in the back were always getting forgotten so now I use a behind-the-door organizer where I can see everything at once.

I LOVE how this pantry organization turned out, and I’m actually confident we can keep it this way! 🙌🏼 #pantryorganization #kitchenorganizationideas
POTS & PANS ORGANIZATION! 🍳✨ We got rid of so POTS & PANS ORGANIZATION! 🍳✨ We got rid of so many pots and pans and switched to using stainless steel only (inspired by one of you!). It was definitely a learning curve, but I feel so good about the change!

With fewer cookware, it made sense to move everything into the cabinet under the stove. This pots and pans organizer has kept them upright, organized, and easy to grab. Comment SHOP for links! #potsandpans #kitchenorganization

GET TO KNOW ME

About
Contact
FAQ

search

CATEGORIES

Lifestyle
Home Decor
Motherhood
Fashion
  • Copyright Notice
  • Affiliate Disclosure

Copyright © 2026 Just A Tina Bit · Theme by 17th Avenue