
Who else is on a cleaning frenzy during this time?! Even though I completed this pantry organization project before the pandemic happened, this would be a great #quaranTINA project to fill up your time while you’re at home! Follow these 4 easy steps to achieve your pantry organization goals!
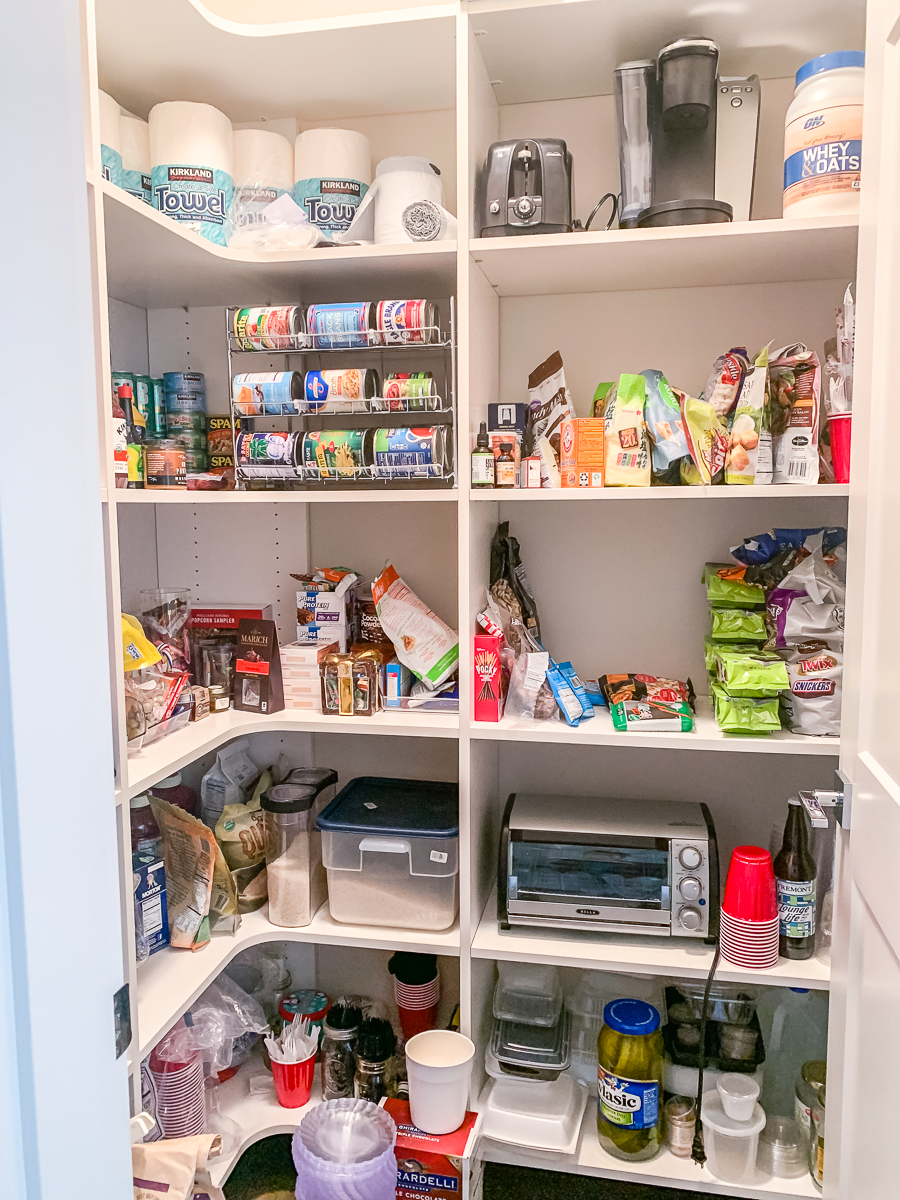
BEFORE
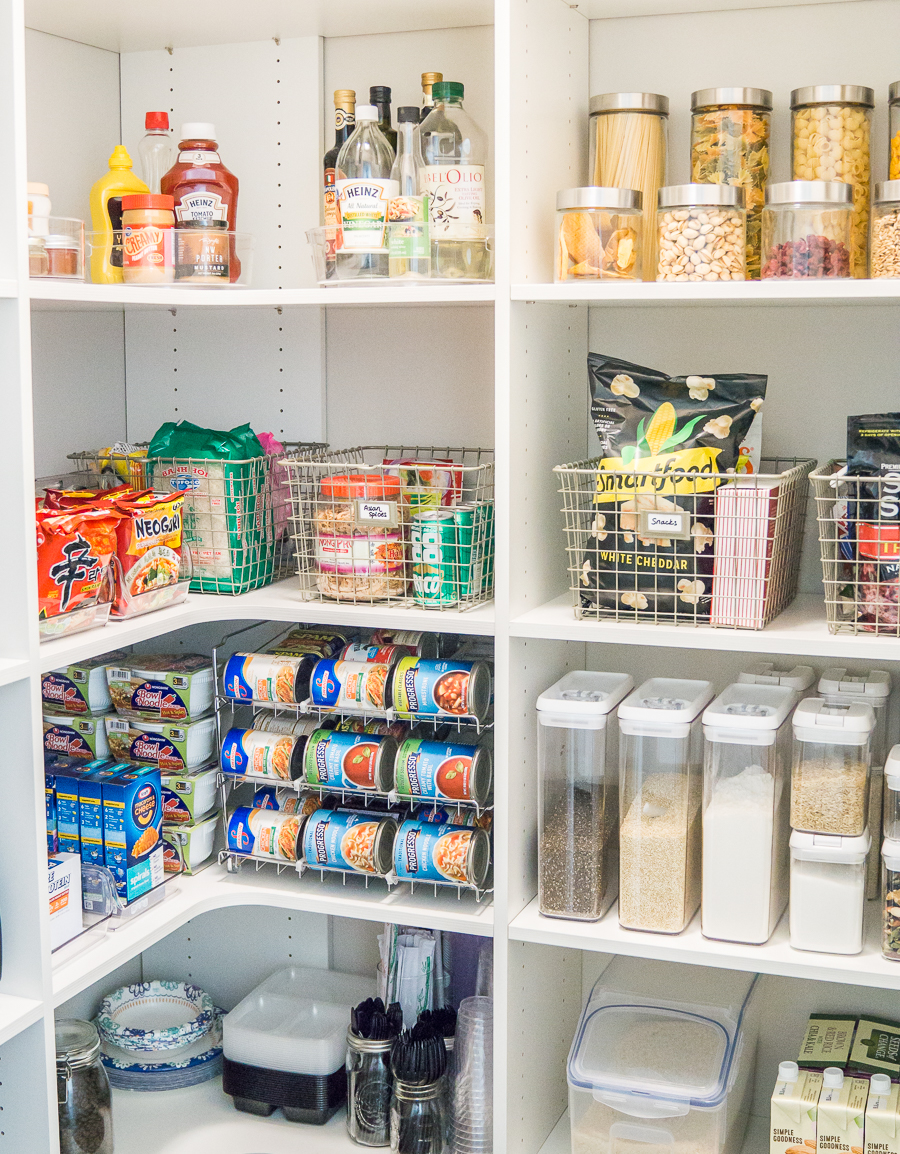
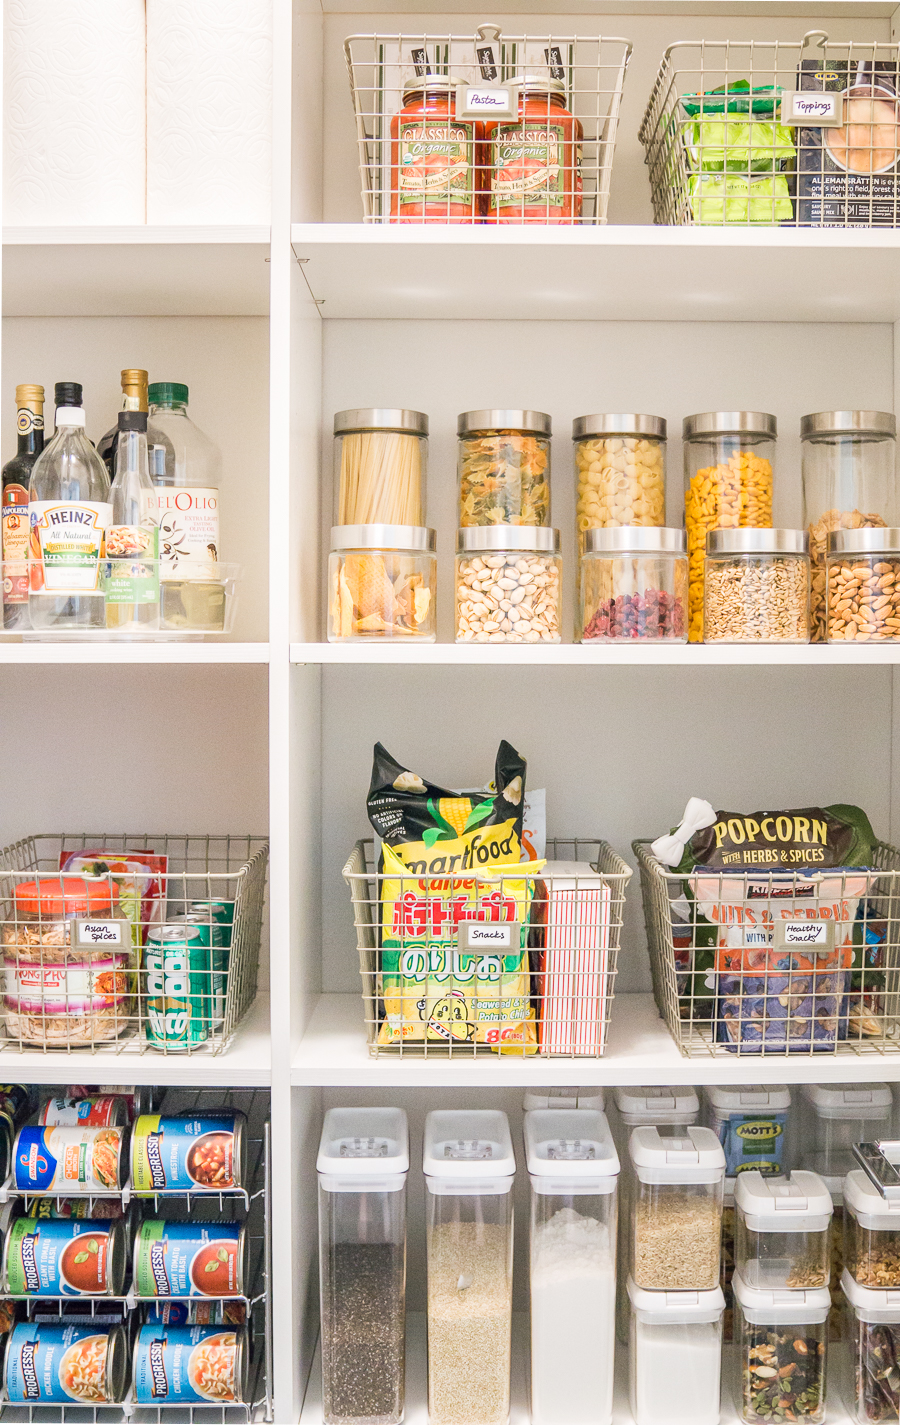
AFTER
Step 1: Purchase Pantry Baskets and Containers
First, take a quick inventory of what you have in your pantry and think about what containers you may need. If you’re not sure, try buying more than you need because you can always return anything you don’t end up using. If you want your pantry to look cohesive, stick to a theme when buying your baskets and containers. For me, I went with grey metal and clear pieces since they were affordable, but I absolutely love white and wooden containers together! Below is a list of pantry organization items I purchased from Amazon, Wayfair, and HomeGoods:
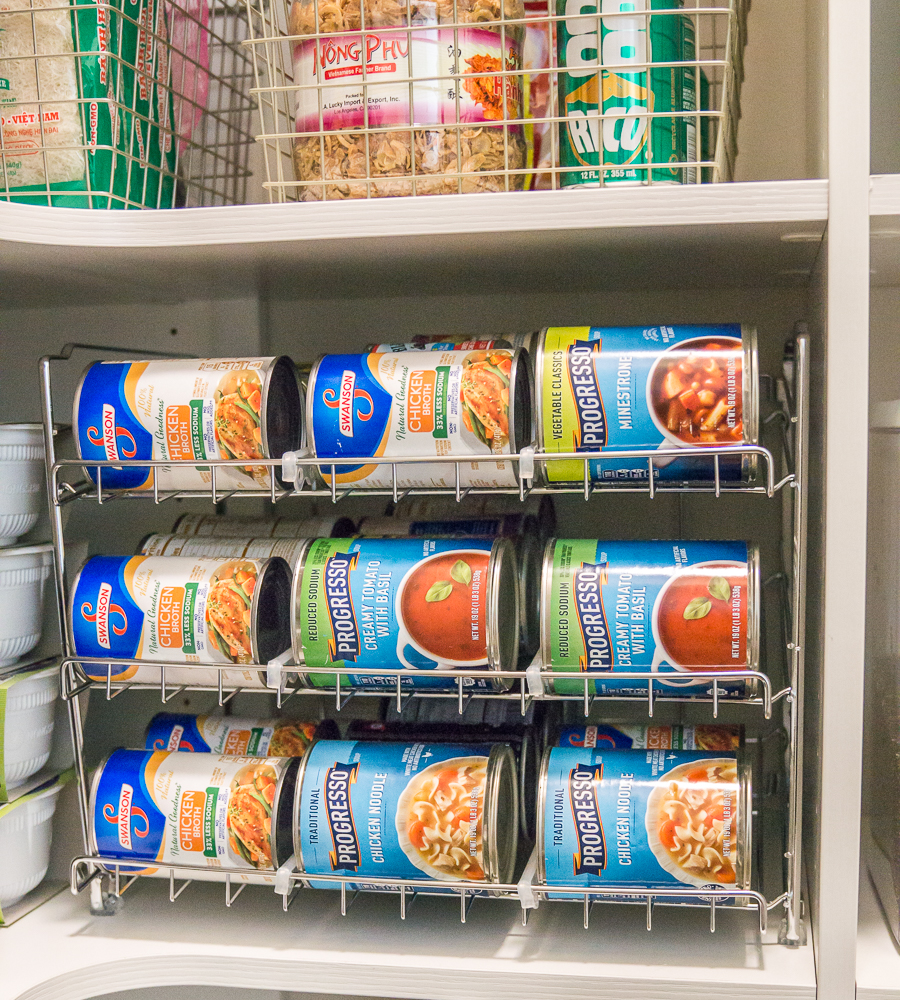
- Can Organizer: Easy to assemble and stores up to 36 cans
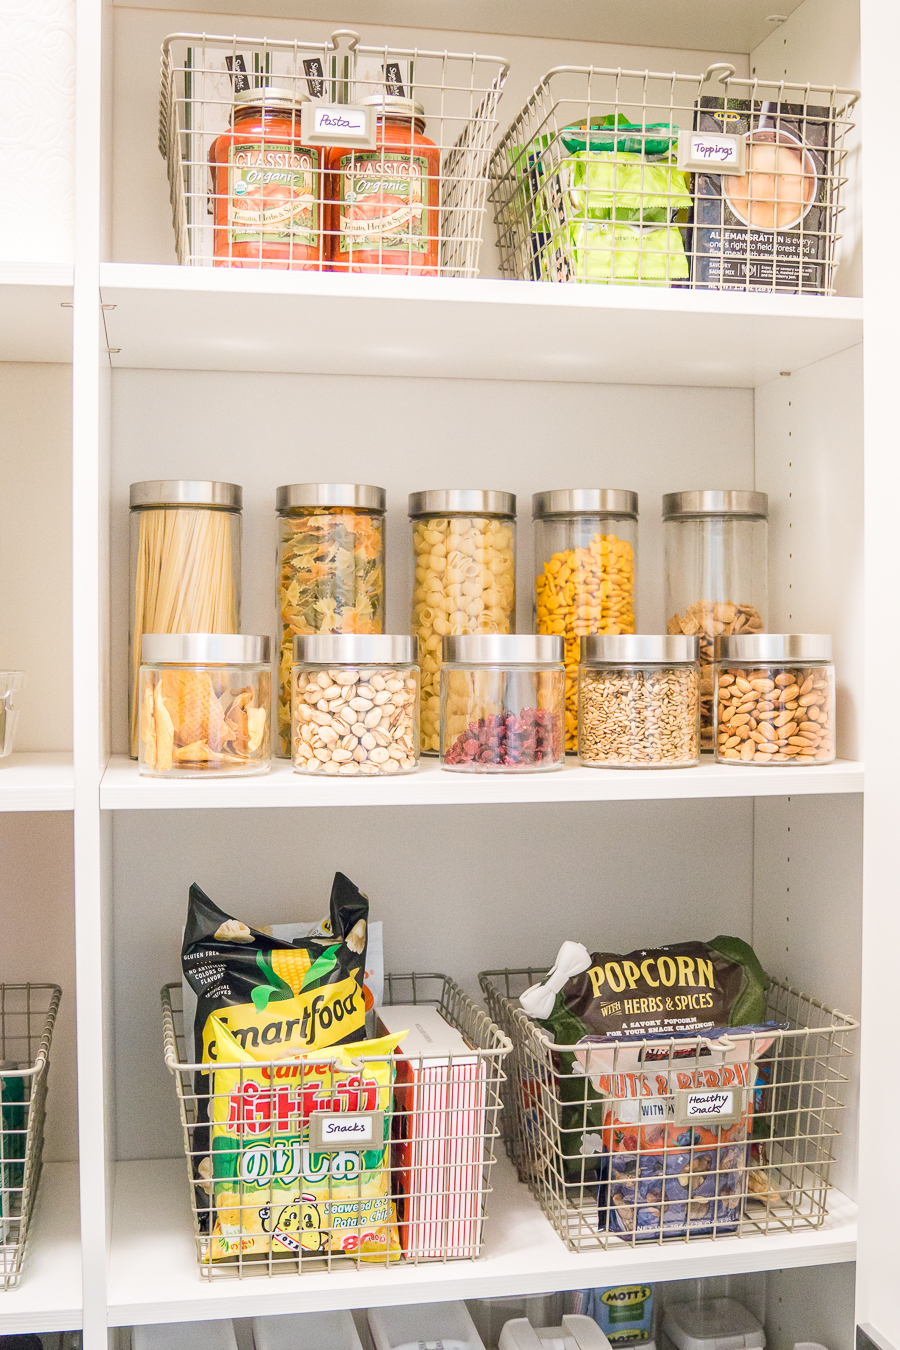
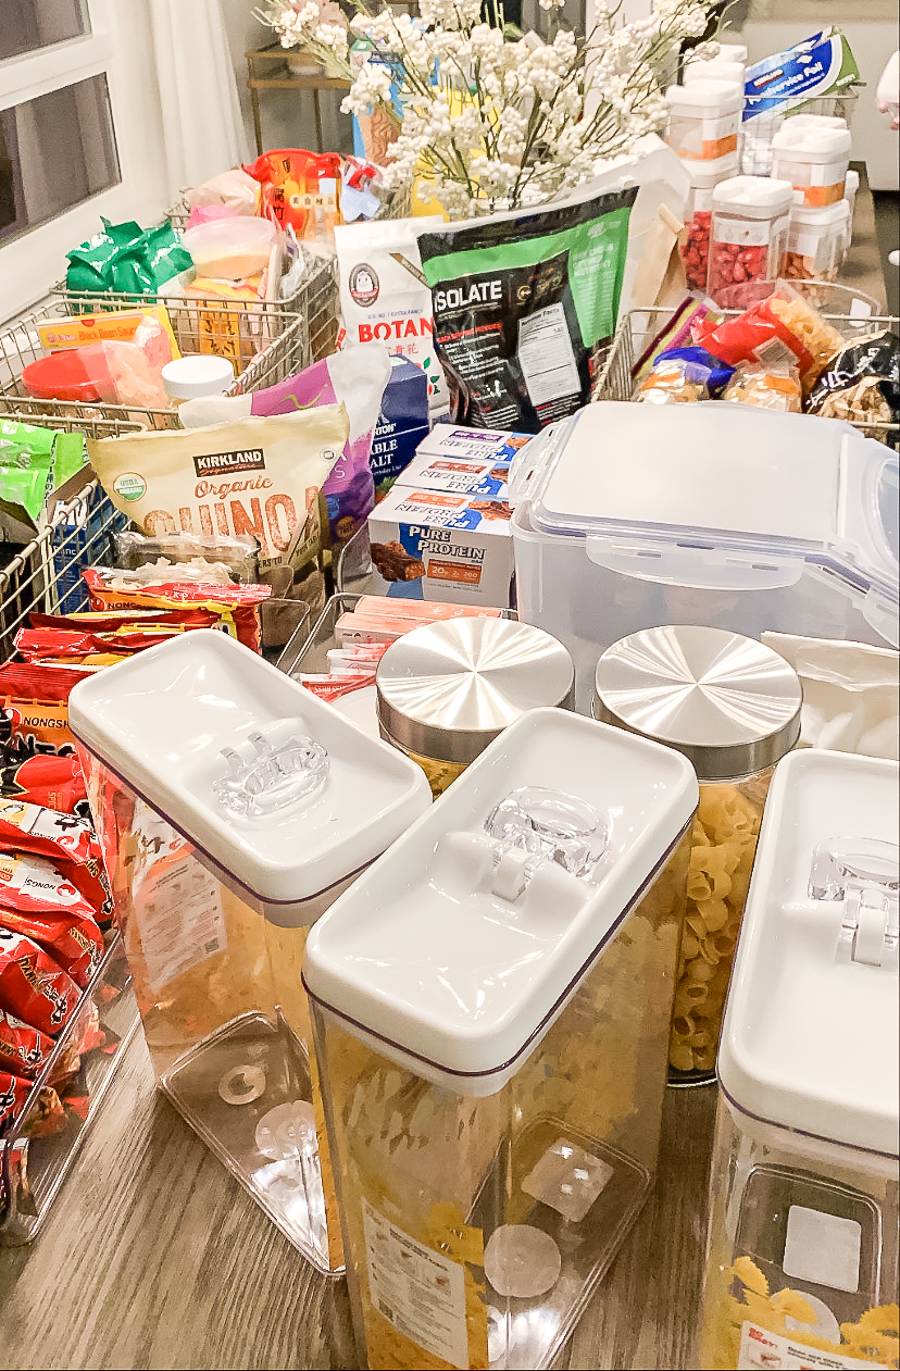
- Wire Baskets: I put bigger items in the baskets like snacks, pasta sauce, and baking essentials
- Rice Container: Love this storage container for storing big bags of rice. I love how it opens up at an angle so I don’t need to move it when I’m getting rice to cook!
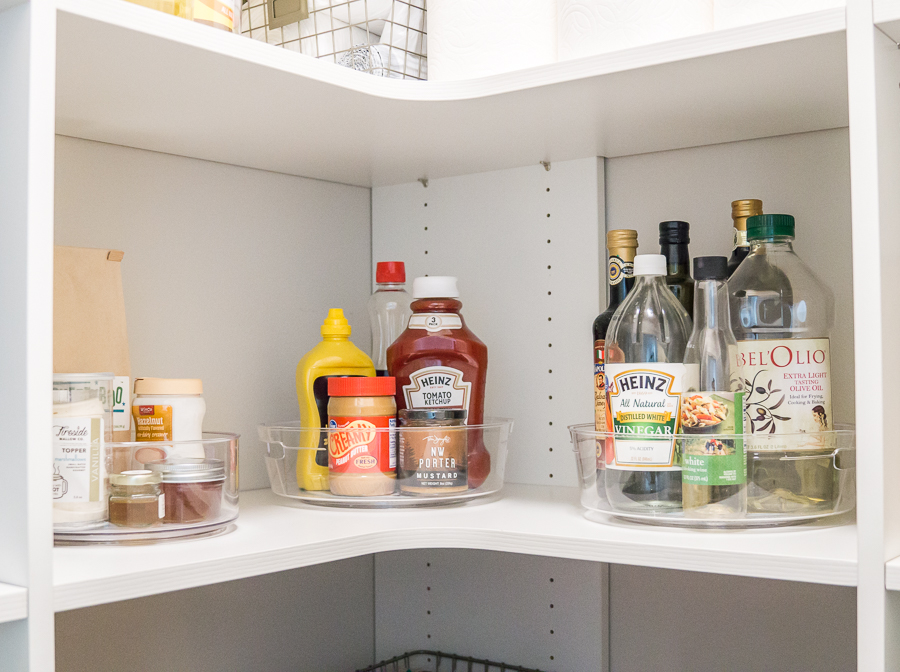
- Lazy Susan: Perfect for storing condiments, oils, and vinegar
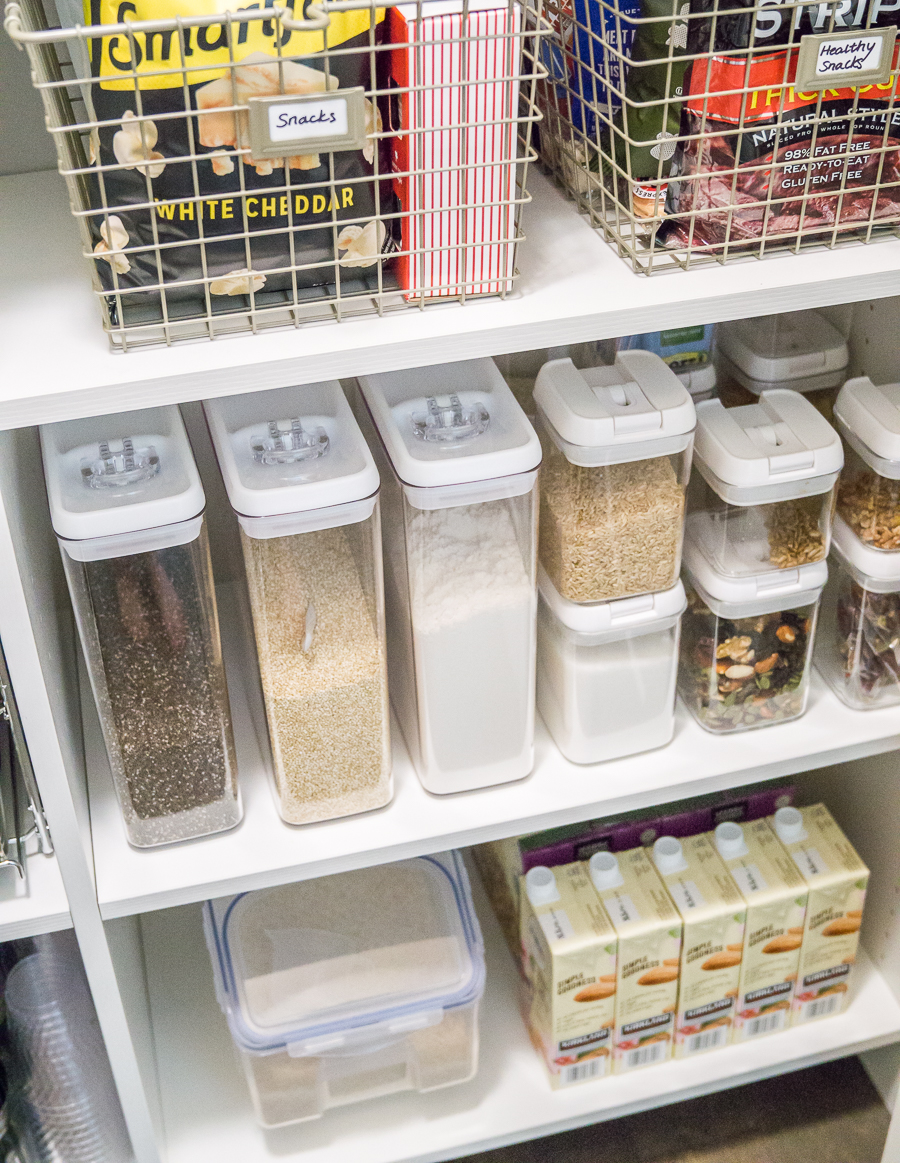
- Clear Air Tight Food Containers: 12 piece set with different container sizes
- Round Glass Storage: I used these to display cereal, dried fruits, and nuts

Step 2: Remove Everything from Pantry and Categorize
I like to completely clear out the pantry so that I can have a fresh start and plan out where things will go. While I’m removing items, I’m also looking at the expiration date and throwing out any old food. Sometimes you forget about certain snacks because the pantry is such a mess! Then, I group my pantry items into categories like chips, nuts, grains, sauces, cans, Asian spices, etc.
Step 3: Organize and Label Categorized Items in Baskets and Containers
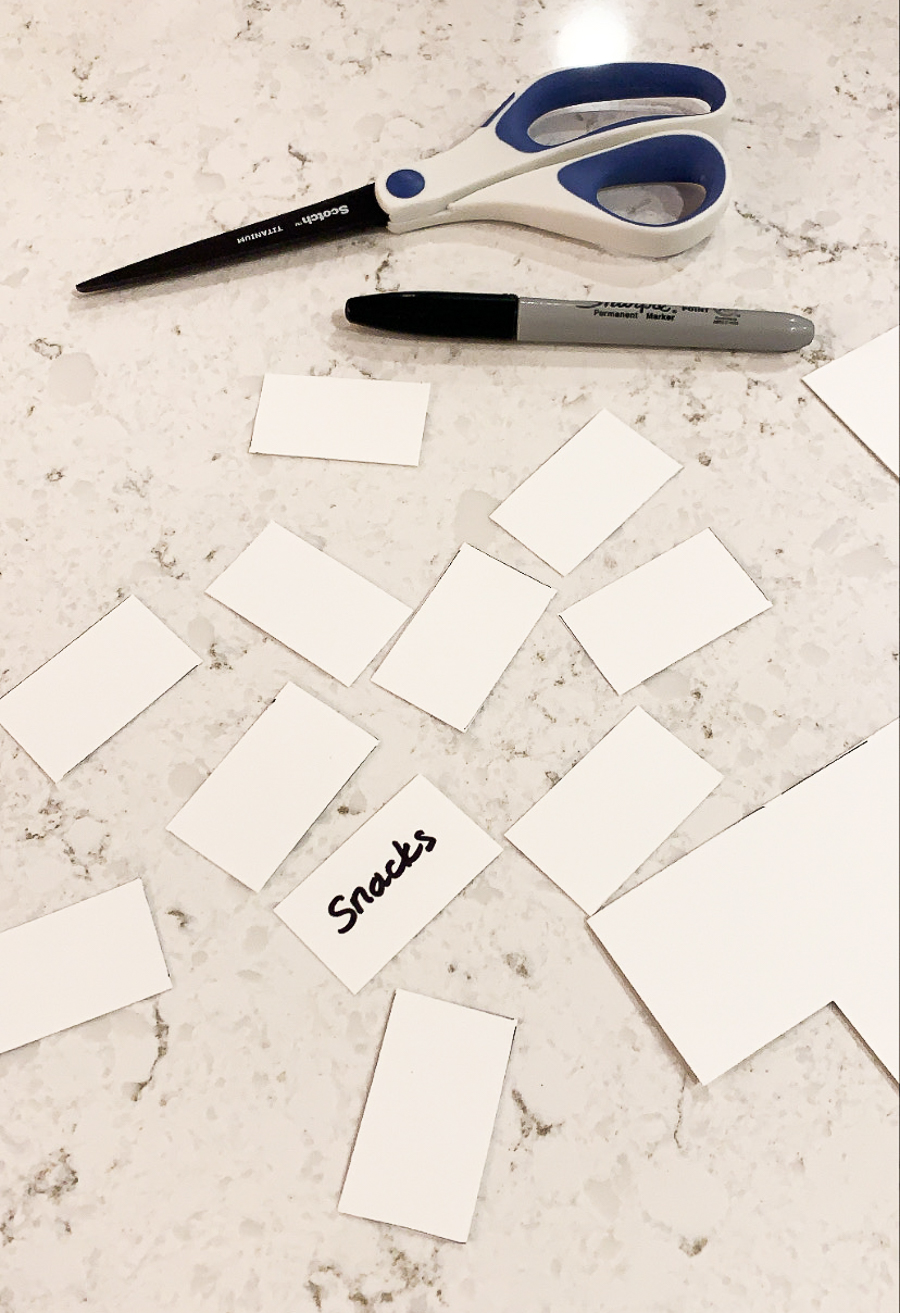
Once I’ve categorized everything, it’s easy to decide and organize what items will go into baskets, lazy susans, and clear containers. I poured a lot of grains and flour into the clear containers so I can visually see them. Next, I labeled the baskets using card stock paper I already had on hand. My clear containers also came with black sticker labels, so I’ll label those at a later time!
Step 4: Organize Pantry
Now it’s time to put everything back into the pantry! As you’re doing this, think about what’s most practical. Because we grab snacks often, I placed the snack basket within reaching distance. For things that I don’t use as much, such as pasta and paper towels, they’ll go up on top! This took me about 3-4 hours total (with lots of breaks in between) and the resulting pantry organization was so worth it! It feels so good every time I go into my pantry now!

This is such a well organized dream pantry!
https://sundaydahlias.com
Wow! I need to do this!
Jennifer
Effortlessly Sophisticated
Nice ideas! Thanks
https://antonellabasile.blogspot.com/
I needed this! Definitely going to be the next project that I tackle. Thank you, Tina!
xx Lily | http://www.thevibrantenthusiast.com
Your pantry is amazing! I love how you are organized it! Thanks for sharing!
http://roadesque.com
Pantry goals! Oooh I am so inspired to tackle my own. I’ve been wanting to get more sustainable in there too but I love the lazy susan and can holders. Especially the latter. I’m always knocking them over the most!
Sxx
daringcoco.com
Well organized! Thanks for sharing!
My blog: https://www.vintage-retro.com/